Tuesday, December 26, 2017

Mini Lebkuchen Doughnuts for Christmas

Lebkuchen is a German biscuit-cum-cake, a bit like gingerbread, that is traditionally eaten at Christmas; they are easy to find in UK supermarkets but having also lived in Germany for two separate periods between the ages of 18 and 22 (both including Christmas) I became quite keen on them.

I thought about making some Lebkuchen at Christmas but didn't get around to it; instead I decided to make some baked mini doughnuts using my Wilton doughnut pan which I was going to flavour with gingerbread spices, but then remembered I had a small packet of actual mixed spices for Lebkuchen that a German colleague had given me a little while ago that I'd never used. So the doughnuts tasted of Lebkuchen and I glazed them with chocolate as Lebkuchen often are.

I used this pan and the Wilton recipe to make Halloween doughnuts last year though I found the batter really thick - possibly because my buttermilk had set quite thick in the fridge - so also added some milk, and switched the plain flour and baking power for self-raising flour as follows:

300g self-raising flour
175g caster sugar
175ml buttermilk
50ml milk
2 tbsp. butter, melted
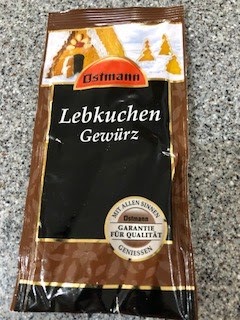
1/2 x 15g sachet of Ostmann Lebkuchen gewurtz
to decorate: 100g plain chocolate

As an alternative to the ready made Lebkuchen spice mix, you could use:
1 tsp cinnamon
1/4 tsp nutmeg
1/4 tsp ginger
1/4 tsp coriander
1/4 tsp ground cardamon
1/4 tsp allspice


Preheat oven to 200C. Mix all the ingredients in a large bowl until you have a batter that is a dropping consistency.

Grease a doughnut pan - you could also try making these as cupcakes in a cupcake tin - and drop in the batter so each doughnut ring is 2/3 full. This quantity will make two batches of 10-12 doughnuts. Bake in the pre-heated oven for 10-12 minutes.


Allow to cool in the tin then turn out onto a wire rack. Melt some plain chocolate in a microwave or bain-marie and spread over one side of the doughnuts and allow to set.

I allowed myself to try a bit even though I'm supposed to be cutting out sugar - it is Christmas after all and I hoped that a few bites wouldn't hurt - and they were delicious, tasting a lot like lebkuchen!

Sunday, December 24, 2017

Chocolate Orange Christmas Bundt Cake


This cake is delicious and a special treat at any time of year but especially at Christmas where chocolate oranges are often a popular gift (though I also asked for a Terry's chocolate orange at Easter some years!).

I had decided to make it before finding out I had gestational diabetes and still wanted to bake the cake, as I was planning to take it to my brother in law's on Boxing Day for everyone to eat anyway - it's not like I was going to eat the whole cake myself. Depending on my blood sugar readings and what else I've had I may be able to have a very small piece of it anyway - the diabetes midwife did say it wasn't a case of not being able to ever have anything sweet, but it has to be a small amount on rare occasions.

Terry's chocolate oranges are, as I said, pretty iconic at Christmas. A month or so ago Tesco had a really good offer of 3 for the price of 1 (no that's not a typo) so I think I paid £3 for three. I decided at the time to give my husband one for Christmas and use the other two for baking.

I thought the chocolate orange slices would look great across the top of a bundt and that the cake itself should be chocolate orange flavour. I'd like to be able to say I developed my own recipe but these days I'm so busy preparing for the baby as well as doing everything else, and I am very tired all the time - I actually baked three different things today and had a nap in between as well! So I used a recipe I found online at Marsha's Baking Addiction.


It was easy to make and delicious (according to my husband who ate the offcuts when I levelled the cake) - really moist and you can taste the orange with the chocolate. I definitely recommend this recipe!


The cake came out of my Nordicware bundt tin easily after I sprayed it with PME Release A Cake Spray 600 ml- sometimes I've had problems with cakes sticking in my metal bundt tins but I really wanted to use it because the ridges around the cake are beautiful and I thought would be perfect for this particular cake.

To decorate the cake once it had cooled, I melted a whole Terry's chocolate orange (broken into segments) and stirred in about 50 ml double cream.


I planned to pour this over the top of the cake but it was still a bit thick so I spooned and spread it into the ridges, and topped each one with another piece of chocolate orange (using half of another one so you need one and a half in total). As a final touch I added some Dr. Oetker gold pearls.

 
I'm pleased with the way it turned out and my husband loved how it tasted so I hope the family enjoy it on Boxing Day!


Saturday, December 23, 2017

Meal Planning Monday 2017 Week 52

Wednesday, December 20, 2017

Personalised Hand-Decorated Ceramics: Father's Day Plate and Egg Cups

I love crafts and making homemade and personalised gifts and this year I kept seeing decorated plates and bowls that I thought looked really cool. I’d seen them on various sites including the local Facebook selling group and could tell they were homemade, so had a look online to figure out how to make them so I could do something myself!
 
You can buy pens that let you draw or almost paint on ceramic crockery; they are not that expensive and you can buy a basic set with a selection of colours for less than £10 on Amazon; they are also available in craft shops. It’s important to make sure that the pens are non-toxic! I bought these ones from Amazon:  Fine Paint Oil Based Art Marker Pen Permanent Chalk Pens Boxed for Metal Rubber Glass Waterproof 12 Pack Colors
 
Some of what I’d read online suggested you need to put the ceramics in the oven after you have decorated them, to fire and set them so the design won’t wash off. I baked the plate at 150C for 30 minutes; I followed the advice to put the plate in a cold oven so it would warm up gradually to prevent cracking.

I'd be interested to know what other people have done because my parents told me even after a few washes it looks like the colour was starting to come off a bit.

 
I created this plate for my dad for Father’s Day but it's also a good idea for gifts at Christmas or any time of year. I bought various bits of ceramic very cheaply at Ikea and decided a plate was the most likely thing my dad would use.
 
He likes a fry-up on the weekend so I decided that would be a good theme for the plate. I like Emma Bridgewater’s style with words around the edge of the plate so I decided to do something similar and started with the words ‘Dad’s big breakfast’, then a star in a different colour, then ‘fry-up’ and another star, then as I still had space, the word ‘yum’ – which makes the plate a bit fun and irreverent I think. There’s plenty of white space in the middle to put the food on, which I think looks better than if there was a design across the whole plate.
 
It was very quick and pretty cheap to do if you intend to use the marker pens again.
 
 
I used them again almost straight away on these two egg cups, which again were very cheap from Ikea. I had a personalised egg cup as part of a set (with a mug as well) as a young child, I remember having it when I was about 8, and I’ve still got them today! I simply wrote the names of my friend’s two daughters on the egg cups and decorated them with polka dots – I think I will give them to the girls at Christmas. 

Monday, December 18, 2017

Meal Planning Monday 2017 Week 51

Almost Christmas!

Monday
Lunch rest of mackerel pasta
Dinner hake in lemon sauce I didn't do at the weekend for me, sausage and mash for him

Tuesday
Lunch  sandwich
Dinner using up leftover hake in a curry for me, from this recipe; chicken curry for him - carried over from last week as I didn't do it

Wednesday
Lunch sandwich
Dinner out; the other half will be at his mum's

Thursday working from home as I have an antenatal appointment
Lunch beans/macaroni cheese on toast
Dinner hunter's chicken in freezer for him, lemon and garlic prawns with spaghetti for me

Friday
Lunch sandwich
Dinner  scampi/ chicken nuggets and chips

Saturday
Lunch breakfast burritos
Dinner sausage casserole and mashed potato I didn't do last week

Sunday  Christmas Eve! With my family

join in the blog hop:

Sunday, December 17, 2017

3D Christmas Cookie Tree


I feel like Christmas has almost passed me by this year. Normally I do all my shopping in November if not before, and do plenty of Christmas baking. This year being pregnant has meant I'm tired a lot of the time, spending half my weekends having naps, and when I am awake I have far more important things to do like register for nurseries which have a one-year waiting list!

My beloved cat was also unwell over the past week but is much better now, and I feel a bit more awake at the moment (I hope that lasts!) so decided it was about time I did something festive. Yesterday I listened to Christmas music while wrapping gifts and actually did some baking.


I bought the Lakeland 3D Christmas cookie cutter set in their January sale last year and hadn't used it yet so this was the perfect time. You get a set of star shaped plastic cookie cutters in varying sizes and two piping bags and nozzles.


There's a recipe on the back of the box which I followed though I also added some cinnamon for a more Christmassy taste. You need to make two cookies from each cutter, though I found the recipe recommended baking the cookies for 12 minutes, which I think works for the larger ones but once you get to the very small cookies, 12 minutes is too long. I baked them in batches and reduced the oven time as the cookies got smaller.


I left them all to cool, then mixed up some icing sugar with water to make a thick paste that I could pipe. I found the nozzle provided in the kit a bit thin so just snipped off the end of the piping bag and piped an outline around the edge of each cookie star. I then added some Dr Oetker gold pearls to the tip of each star while the icing was still soft.


Next I made up some thinner icing and used it to flood the inside of the cookies, and left them all to set.

The final step is to layer the cookies starting with the largest on the bottom; as you have two of each size, rotate one so that the points on the star are sticking out between the points of the cookie underneath.

I placed the final small star standing up on the top of the 'tree' though you could also add another decoration on top if you like.


The effect is really pretty and it is a little time consuming to bake this many cookies when you can't get them all in the oven at once but otherwise it's a very easy kit to use and something you could do with children. The cookies tasted really nice too - we tucked into them after helping my mother-in-law decorate her tree.

I'm sharing this with Cook Blog Share, hosted this week by Hijacked by Twins.

Monday, December 11, 2017

Meal Planning Monday 2017 - Week 50

Friday, December 8, 2017

Forever Friends Decoupage Christmas Cards

Thursday, December 7, 2017

Review: Novotel London Excel

Tuesday, December 5, 2017

Meal Planning Monday 2017 - Week 49

I seem to be blogging even less and less these days. This weekend my husband and his dad built our new cot, moved the bed to the other spare room and moved the futon that was in there into the nursery. I was re-organising and tidying as they went, which is about the only thing I achieved this weekend as I spent half of Saturday and half of Sunday asleep! I don't know why I'm so tired - I'm not anaemic and most of the friends I've spoken to didn't experience this, apart from one who told me she often had to close her office door during the day and take a nap!

I didn't post my meal plan yesterday for two reasons, I hadn't actually written it (!) and also I had a rare night out on Monday night which ended with my connecting train being cancelled and having to stand in a mini-cab queue late at night by myself in a not particularly nice area. Sigh. I haven't really arranged any other pre-Christmas get-togethers with friends which is a shame but based on last night I don't really fancy it right now anyway!

So here's this week's meal plan

Monday
Lunch ham sandwich
Dinner you know when you're out drinking and you don't actually have dinner then get a snack at the train station on the way home? (Londoners who commute will know what I mean, anyway). When you're not drinking you suddenly realise part way through the evening that you are really hungry... and then your train is there and there's no time to get food, then your connecting train is cancelled and you're left in a dodgy area where the only thing open is KFC which really doesn't look that appealing.. and by the time you get home all you can find that you can eat (as you want hot food that's quick) is a packet of micro-chips in the freezer. That.

Tuesday  morning off to visit a very cool nursery that has its own mini farm complete with miniature goats and what they claim are micropigs that are just all grown up now.. I think someone conned them into buying normal pigs as they were huge!
Lunch coronation chicken sandwich bought from the bakery on the way home
Dinner homemade chicken pie using chicken from Sunday's roast

Wednesday working from home as I have an antenatal appointment
Lunch soup possibly - homemade if time but I never seem to get time these days!
Dinner chicken curry

Thursday
Lunch bagel if they haven't gone off already as I can't remember where I bought them!
Dinner lamb/ beef grillsteak with mashed potato

Friday
Lunch maybe a sandwich
Dinner might go to yoga as it was cancelled last week and I couldn't go for a few weeks so if I do, I'll have a baked potato or microwave risotto for dinner and my husband can have a frozen pizza

Saturday
Lunch sausage sandwich if we have bread, or baked potatoes if not
Dinner caramelised minute steaks with mustard and potato wedges based on this recipe

Sunday need to eat a special diet for three days ahead of a glucose tolerance test
Breakfast 2 crumpets, fruit juice, tea with milk
Lunch tuna melt bagel (pizza bagel for him), packet of crisps, glass of milk
snack: 3 rich tea biscuits
Dinner pork chop with roast potatoes and veg - sausages and Yorkshire pudding for my husband - followed by 3 rich tea biscuits and potentially 1/3 packet sugar-free angel delight

Join in the blog hop

Sunday, December 3, 2017

Tattered Lace Ornate Reindeer Christmas Cards

When I got my Sizzix Big Shot cutter two Christmases ago, I also received a beautiful tattered lace die called 'ornate reindeer'. I cut out several reindeer from sparkly cardstock almost right away, with a view to making cards for the following Christmas, but then that Christmas (last year) I made a few cards but think I forgot about these die cuts! So when I came across them earlier this year I made a few cards that I am now able to send out this year.

I've written before about using the die cutter and tattered lace dies. This one was particularly fiddly in places so my poking tool came in handy!

What I hadn't realised initially was the size of these dies - they take up most of the size of a standard 6x4 card blank, not leaving much room for other embellishments.

 
I did try out some different things though I'm not sure which of these works best and I don't feel like I'm really doing justice to the tattered lace die cuts. If you have this die and some good ideas for how to use it, please let me know!

For these first two cards I used large gold card blanks so I wouldn't need any other background. For one card I cut a gold oval with scalloped edges using another die, and mounted the reindeer on it - the reindeer is cut from sparkly red card. I added the words 'winter joy' which are from another die - I think it's actually a die of Christmas baubles with the words in the middle.

For the card on the right, I cut the reindeer from sparkly black card and mounted it using the smallest adhesive pads I could find which I even cut in half but you can still see them behind the reindeer. The ornate shapes around the edges are offcuts from die cutting - as this was so long ago I can't remember if they were the bits that came out from the spaces in between the antlers or from another die altogether. I used a 'merry Christmas' gold outline sticker to finish the card.


Here I covered the card blank on the left with two pieces of printed paper in complementary light blue colours - you can't see too well but I think they both have a snowflake design. I cut the reindeer from sparkly gold card and stuck it on the top half of the card, and a wooden gold card topper saying 'joy' - from a pack from The Works - on the bottom.

For the second card, I turned a gold card blank sideways and put two reindeers facing each other - one made from sparkly bronze card, the other from sparkly gold, with a 'merry Christmas' outline sticker in the middle and two little gold stars in the corners.


Finally I made a CAS (clean and simple) reindeer card using a green card blank and a reindeer die cut from gold card (non-sparkly this time) and a 'merry Chrismas' out line sticker.


I found the last of these in particular quite masculine so am linking up with the Cardz 4 Guyz challenge where the theme this week is reindeer.